Showing posts with label do-together crafts. Show all posts
Friday, December 12, 2014
Wednesday, December 10, 2014
Tuesday, December 9, 2014
Advent Day 9: DIY Snowglobes!
We've had these strange little jars (I have no idea where they came from) for a few years, and thought they might be cute to use for making our snowglabes. I had originally intended to use mason jars, but the figurines we found were on the small side.
To make these, all you have to do is:
- Hot glue waterproof figurines to the lid of a glass jar (make sure you can put the lid on the jar!)
- Add glitter and water
- After putting the lid on the jar, seal by hot-gluing around the edge of the lid

To make these, all you have to do is:
- Hot glue waterproof figurines to the lid of a glass jar (make sure you can put the lid on the jar!)
- Add glitter and water
- After putting the lid on the jar, seal by hot-gluing around the edge of the lid
Tuesday, December 3, 2013
Monday, December 2, 2013
Advent 2013, Day 1
For the past few years, instead of doing an Elf on the Shelf, we've had a Magic Holiday Mailbox! Everyday, Santa's "elves" leave our daughter fun activities and treats to do with family and friends. This year is no different! The magic mailbox made it's return yesterday with a letter from Santa, a snowman chocolate, and the activity of going to buy toys for the local 'Toys for Kids.' I didn't feel it would be right to take pictures of the outing, but here is her getting her letter from Santa, which she LOVED!
The Santa Envelope template was from www.mrprintable.com

The Santa Envelope template was from www.mrprintable.com
Sunday, May 12, 2013
Mommy-and-Me Do Together Craft: Photo Frame/Art Display
My kiddo loves to paint, and I'm always trying to think of cool ways to display her art. I was at the dollar store scoping out frames for an office-redo project I'm working on, and had an idea to make some mother's day frames that for interchangeable artwork and photos.
While Viv got to work crating some masterpieces, I heated up the 'ol hot glue gun and started by cutting a few pages out of an old photo album.
Measure and mark on a paper instert exactly where you will want to glue onto the plastic... this will save you from having a crooked frame.
I covered by photo frame insert with felt and foam frames... remember not to glue the top of the insert and frame if you want to be able to change the photo!
Ready for artwork!

While Viv got to work crating some masterpieces, I heated up the 'ol hot glue gun and started by cutting a few pages out of an old photo album.
Measure and mark on a paper instert exactly where you will want to glue onto the plastic... this will save you from having a crooked frame.
I covered by photo frame insert with felt and foam frames... remember not to glue the top of the insert and frame if you want to be able to change the photo!
Ready for artwork!
Friday, May 10, 2013
Kiddo Craft: Chalk Driveway Paint
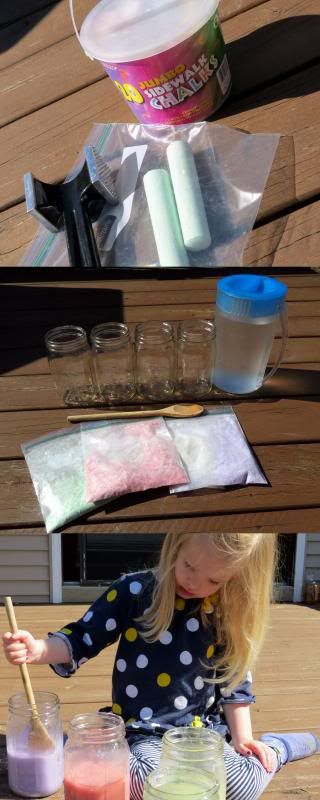
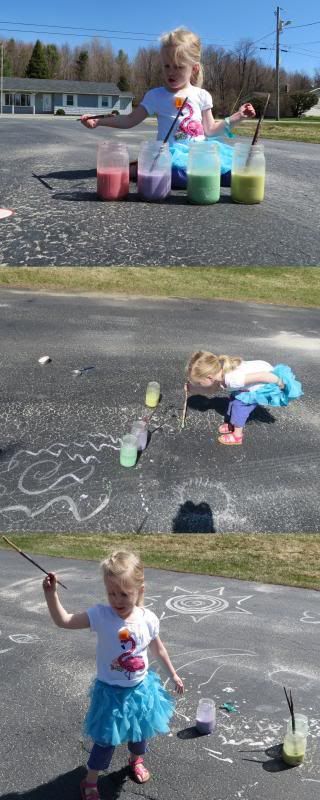
This was so easy to do....we have more large sidewalk chalk than one family (despite our numerous chalkboards) would ever go through in a reasonable amount of time, so here's what we did:

- Placed the chalk in thick-ish ziplock bags, and used a meat tederizor to crush it up (a regular hammer will do, I just didn't feel like searching for one that early in the morning).
- Combine with water in containers with lids that seal!
- Enlist a petite helper or two to mix mix mix and shake shake shake!
Sunday, April 14, 2013
Kiddo Craft: Birdhouses and Butterfly Feetsies
When we moved into our house we were given an unpainted birdhouse for Viv to decorate. Since we're in the midst of mother nature's fickle 'is-it-spring-or-is-it-winter' dance (an as I typed this, it started to snow again), we decided that today would be the perfect time to do something to welcome spring!

And since we had some paint leftover... we made a fe spring creatures of our own :)
Bring on the sunshine!
Saturday, March 2, 2013
KIddo Craft: Melted Crayon Madness With My Little Lady
Have I mentioned how much I love doing artsy-craftsy projects with my little lady? Well, I do. In fact, you could say I *luff* it even..We have an abundance of crayons (and were inspired by the Sofia the First episode 'A Royal Mess), so I decided today's craft would be the 'ol wax paper-and-crayon "stained glass. My husband claims to never have done this, and I'm kind of in awe. I thought it was a childhood rite of passage to have to iron leaves and crayon shavings between two pieces of wax paper! But, I digress...
You know I remember this being MUCH less messy to do as a kid... :)
Thursday, February 14, 2013
Low-Cost Valentine's Day
Or would that be LO-cost Valentine's Day? Hahahahahah..hahha..ha...mmm. Yes, I'm often a lot less funny out loud than i am in my head. ;-)
We're not huge into celebrating Valentine's day, although it's certainly fun to do crafts with Viv and all that! Here are the two little things Vivi and I made for Mike:
Photo Collage: This actually only took a few minutes to do each part! About 10 minutes to take the pictures, 10 minutes to edit them and add the text (we used Picasa), and about 3 minutes to print. Total cost: $3
Message in a Bottle:
I saw this idea on Pinterest, and when I came across the bottle at the dollar store, I decided it might be fun! I opted to remove the gaudy faux rose petals (Mike doesn't really dooo faux petals, and the pre-written (well what's the fun in that?) note. We replaced them with some M&Ms, a "Daddy and Me" picture Vivi drew, and large amount of stickers that all preschool-aged projects require. Total cost: $4
Happy Valentine's Day!

We're not huge into celebrating Valentine's day, although it's certainly fun to do crafts with Viv and all that! Here are the two little things Vivi and I made for Mike:
Photo Collage: This actually only took a few minutes to do each part! About 10 minutes to take the pictures, 10 minutes to edit them and add the text (we used Picasa), and about 3 minutes to print. Total cost: $3
Message in a Bottle:
I saw this idea on Pinterest, and when I came across the bottle at the dollar store, I decided it might be fun! I opted to remove the gaudy faux rose petals (Mike doesn't really dooo faux petals, and the pre-written (well what's the fun in that?) note. We replaced them with some M&Ms, a "Daddy and Me" picture Vivi drew, and large amount of stickers that all preschool-aged projects require. Total cost: $4
Happy Valentine's Day!
Saturday, February 2, 2013
Kiddo Craft: "Magic" Message Painting
Is it spring yet? We spent this chilly afternoon doing some arts and crafts!
Using the clear crayon leftover from Easter egg dying (white crayons would work too, but our paper was slightly gray so I went with this) I created some pictures and messages for Viv to water color and discover what each one was. Easy-peasy and really fun for little ones! Viv painted about 12 in all, but would have gone on all afternoon if I hadn't started running low on crayon :)

Using the clear crayon leftover from Easter egg dying (white crayons would work too, but our paper was slightly gray so I went with this) I created some pictures and messages for Viv to water color and discover what each one was. Easy-peasy and really fun for little ones! Viv painted about 12 in all, but would have gone on all afternoon if I hadn't started running low on crayon :)
Subscribe to:
Posts (Atom)