Photobucket Photobucket Photobucket Photobucket
Showing posts with label art. Show all posts

Thursday, December 3, 2015

Advent Countdown - Day 2


Today's book was 'Eloise Decorates for Christmas' By Kay Thompsen and others

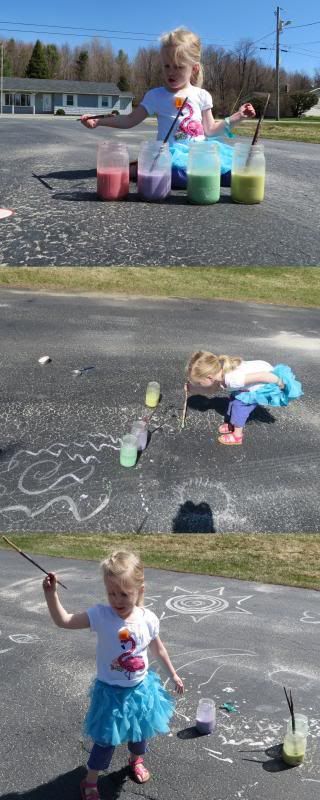
We're big Eloise fans! Tonight our accompanying craft was to make snowman decorations of our own, with photos to give to friends!


Tuesday, December 9, 2014

Advent Day 9: DIY Snowglobes!

We've had these strange little jars (I have no idea where they came from) for a few years, and thought they might be cute to use for making our snowglabes. I had originally intended to use mason jars, but the figurines we found were on the small side.

To  make these, all you have to do is:
- Hot glue waterproof figurines to the lid of a glass jar (make sure you can put the lid on the jar!)
- Add glitter and water
- After putting the lid on the jar, seal by hot-gluing around the edge of the lid
 
post signature

Friday, May 10, 2013

Kiddo Craft: Chalk Driveway Paint

This was so easy to do....we have more large sidewalk chalk than one family (despite our numerous chalkboards) would ever go through in a reasonable amount of time, so here's what we did:
  • Placed the chalk in thick-ish ziplock bags, and used a meat tederizor to crush it up (a regular hammer will do, I just didn't feel like searching for one that early in the morning).
  • Combine with water in containers with lids that seal! 
  • Enlist a petite helper or two to mix mix mix and shake shake shake!
Make sure you frequently mix each  color!

post signature

Sunday, April 14, 2013

Kiddo Craft: Birdhouses and Butterfly Feetsies

When we moved into our house we were given an unpainted birdhouse for Viv to decorate. Since we're in the midst of mother nature's fickle 'is-it-spring-or-is-it-winter' dance (an as I typed this, it started to snow again), we decided that today would be the perfect time to do something to welcome spring!
And since we had some paint leftover... we made a fe spring creatures of our own :)
Bring on the sunshine!
post signature

Saturday, March 2, 2013

KIddo Craft: Melted Crayon Madness With My Little Lady


Have I mentioned how much I love doing artsy-craftsy projects with my little lady? Well, I do. In fact, you could say I *luff* it even..We have an abundance of crayons (and were inspired by the Sofia the First episode 'A Royal Mess), so I decided today's craft would be the 'ol wax paper-and-crayon "stained glass. My husband claims to never have done this, and I'm kind of in awe. I thought it was a childhood rite of passage to have to iron leaves and crayon shavings between two pieces of wax paper! But, I digress...
You know I remember this being MUCH less messy to do as a kid... :)
post signature

Thursday, September 6, 2012

Chalkboard Wall: How NOT to DIY (A Step-By-Step Guide)

I'm normally pretty crafty, but someone please take away my hot glue gun, and send me remedial arts and crafts after the wallpaper/paint debacle that was the last day or so.

We have this big empty wall in our kitchen, and I thought it would be fantastic to make a chalkboard calendar (the kind that keeps popping up all over Pinterest) out of it. And here it is, all set and ready to schedule...


This should have been easy-peasy lemon-squeezy.

SHOULD have.

Here's a step-by-step guide on he do's and don'ts on making a chalkboard wall calendar:

Step 1.
DO: Measure, measure, measure: Make sure you check your measurements multiple times before marking and taping.
DON'T pay attention to my bad hair day (boho braid brought to you in full by mommy morning madness)


Step 2:  Tape it off!
DO: Have a princess tambourine player on hand to entertain you, as this step is kind of boring.


DO: Enlist your local BFG to help you with the high-up parts


Step 4: Paint (chalkboard paint comes in both regular and spray form)


Step 5: Let dry, then remove tape
DON'T:  USE CHEAP TAPE. Seriously, splurge on the type that is guaranteed not to leak. Do not buy the bargain brand or this will happen!

Step 6: Plan B
DO: try various paint removal techniques before throwing in the towel
DON'T: Attempt to 'lightly" scrape any paint off, it may cause accidental wallpaper butchering resulting in this...


And if THAT happens, definitely do NOT decide to remove the wallpaper AROUND the chalkboard like this:


Because if you do, you will spend all night doing so, only to have to wake up, go to the store, get GOOD painter's tape, go home, finish removing the wallpaper, sand AROUND EVERY FREAKING CHALKBOARD SQUARE, re-tape and then paint.

Why not just remove all the wallpaper and start from scratch? Because I will be damned if I'm going to w waste the money I spent on the chalkboard paint (that stuff is expensive!), especially since the majority of the squares didn't run.

I'm not even going to post all the pictures of how bad this got. 

If you ignored my previous advice and did this the hard way, or just feel like you haven't F'd your project up enough, go right ahead and hand-letter the days of the week. By this point you will be so tired that you will also probably write them the Canadian way, starting with Monday rather than Sunday, and your handwriting will look like a 4th grader's.

Ta-DA! You now how a chalkboard wall (and possibly a migraine).


post signature

Friday, May 7, 2010

I could write some long [read: pretentious] testimonial here about how introducing my child to art at an early age will open her mind and awaken her senses... but no one needs (or has any desire) to hear about any of that, and I have no earthly longing to write about it. Sure, exposure to art can help develop the brain and provide and outlet for emotional expression, yadda yadda yadda and all that.

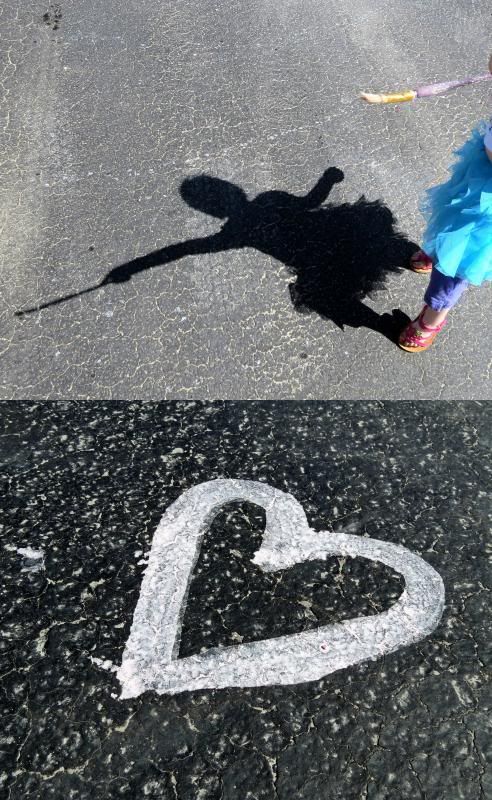
It's also (*most importantly*), what us common folk refer to as, ya know... fun.

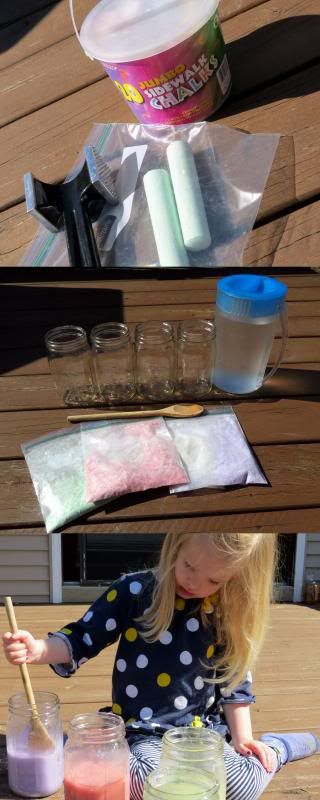
Fingerpainting on a rainy afternoon? WIN! My little 'arteeest' was thrilled with her first go-'round with painting, and now that I know she will not try to *eat* the art supplies, I am equally as enthused.

Two mom thumbs up for Crayola Kid's Paint too! In addition to Viv being covered in paint, the floor and the tub were *shmeared* with color as well. Color me impressed (color, get it? ahhhh... I slay me) because this is one "washable" product that did not mean "scrub for hours and it should eventually come off."

(click to enlarge)

post signature